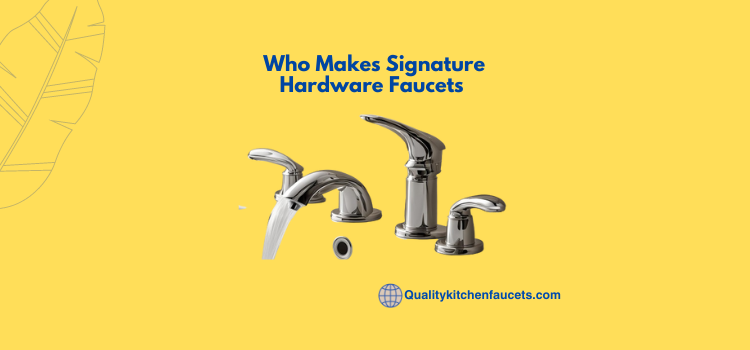

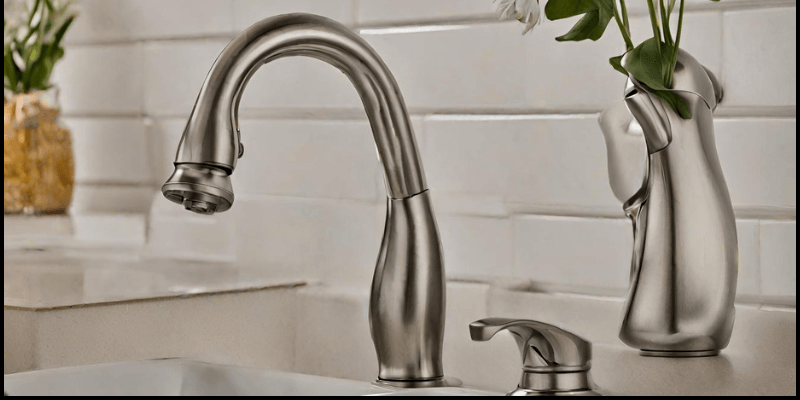
How to Remove Moen Kitchen Faucet Handle
Dealing with a stubborn water outlet kitchen spigot grip can be a common yet frustrating issue many homeowners face.
A buildup of mineral deposits, or simply the passage of time, a stuck or malfunctioning cock dial disrupts the functionality of your kitchen, making daily tasks more challenging. It’s an all-too-familiar scenario that demands attention, lest it complicate kitchen activities further.
Luckily, the solution to this predicament is not as daunting as it might seem. Removing the spigot kitchen tap lever with the right tools and patience can be a straightforward DIY task.
This process not only promises to restore the functionality of your faucet but also provides an opportunity to clean or change parts that might cause future issues. By addressing this problem, you can ensure smooth operation and extend the life of your bibcock.
This article is designed to guide you through the simple steps of successfully removing a spigot kitchen control arm. By following our comprehensive instructions, you’ll save on potential plumbing costs and gain a sense of accomplishment from tackling the problem yourself. Stay with us as we walk you through the essentials of this maintenance task, ensuring your kitchen faucet returns to its optimal working condition in no time.
How to Remove Moen Kitchen Faucet Handle? 10 Steps
If you follow the exact one given below by an expert, you’ll get a ride on your How to Uninstall Tap Kitchen Bibcock Hold issue.
procedure-by-procedure Guide to Removing a spout Kitchen water tap handgrip
This is typically done by clockwise turning the valves under the sink until they stop.
Identify the lever type: water outlet faucets come in various examples, some with visible screws and others with hidden ones. Determine if your faucet’s screw is capped or if it requires a specific tool for withdrawal.
1. Take off the cap (if applicable)
If your lever has a cap concealing the screw, gently pry it off with a flathead screwdriver.
Slacken the Set Screw: Using the appropriate size Allen pliers, locate and loosen the set screw found on the handle’s body. You do not need to take off completely; it is just enough to free the hold.
2. Extract the Handle
With the set screw loosened, you should be able to lift the grip off the faucet’s stem. If it doesn’t come off quickly, gently wiggle it or use penetrating oil around the base to release mineral deposits.
3. Inspect for damage or deposits
With the hold removed, inspect it and the bibcock stem for any signs of damage or mineral buildup. Clean any debris you find with a soft cloth and mild cleaner.
Supplant Any Damaged Parts: If you find any damaged parts, now is the time to replace them.
4. Reassemble the AP
Once everything is clean and any necessary parts have been substituted, reassemble the bibcock by reversing your action to disassemble it. Place the handgrip back on the stem and constrict the set wist securely.
5. Turn the Water Supply Back On
Finally, turn the water valves back on and test the bibcock for proper operation. Make any necessary adjustments to ensure it is functioning smoothly.
Following this detailed measure, you should successfully extract your tap kitchen gate button, address any underlying issues, and reassemble it for continued use.
Specific Issues and Solutions for water outlet Kitchen spout Handles
6. Unique Set rotate Challenges
For those facing particularly resistant set screws in spigot kitchen ap handles, a combination of creativity and patience proves to be critical.
One unique solution involves heating the lever slightly with a hair dryer. The gentle heat can expand the metal slightly, making the turn easier to untighten.
If penetrating oil hasn’t worked, apply a vinegar solution directly to the area around the secure.
Vinegar’s acidic nature can help dissolve mineral deposits that might cement the unfastening. Remember, when employing these techniques, exercise caution to avoid damage to the faucet’s finish or components.
7. Dealing with Stripped Screws: Effective Detachment Techniques
Stripped and Unloosen Remedies: Ingenious Tactics for Extraction
Stripped screws pose a significant challenge when disassembling any part of a tap kitchen bibcock, mainly the grip.
When the usual tools no longer grip the screw’s head, it’s time to employ more innovative measures. One effective tactic is to use a rubber band.
Place a broad, strong rubber band flat over the stripped screw’s head, and then press your wistdriver into the rubber band and rotate.
The rubber band can provide the extra grip needed for the screwdriver to catch and turn the screw. Another method involves using a drill with a turn extractor bit.
This specialized tool is designed to dig into the stripped head and reverse the fastener out of its position. Although this method is more invasive, it can be incredibly effective when other techniques fail.
Remember, with each approach, patience and a gentle hand are crucial to avoid further damage to your emit.
8. Handling Stuck Caps: Tips for Safe and Easy Elimination
Encountering a stuck cap when trying to detach a water outlet kitchen AP switch can be frustrating, but there are efficient ways to address this without causing damage.
A standard method involves using duct tape or a rubber strap spanner.
Wrap the duct tape around the cap to create a makeshift grip that allows you to twist it off quickly. Alternatively, a rubber strap adjustable spanner can provide the necessary leverage without marring the cap’s surface.
If these methods don’t work, applying a small amount of penetrating oil around the cap’s perimeter can help untighten mineral deposit bonds.
Allow the oil to sit for several minutes before attempting extraction again. These approaches offer a safe way to unfasten stubborn caps from your spigot kitchen bibcock, clearing the path to grip removal and maintenance.

9. Addressing Corrosion and Mineral Deposits: Cleaning and Prevention Strategies
Reducing Future Issues with Maintenance: Proactive phase for discharge longevity.
Maintaining your tap kitchen app regularly is essential to prevent future issues such as tight set screws, stripped screws, and stuck caps.
A simple yet effective maintenance routine includes regularly cleaning the faucet’s surface with a mild, non-abrasive cleaner to avoid mineral deposits building up.
Additionally, lubricating the Set and other movable parts with a silicone-based lubricant can significantly reduce the chances of these parts becoming stuck or difficult to operate over time.
Inspecting your bibcock periodically for signs of wear or corrosion and addressing them promptly is also beneficial.
By taking this proactive step, you can extend the lifespan of your Moen Kitchen app and ensure its smooth operation for years to come.
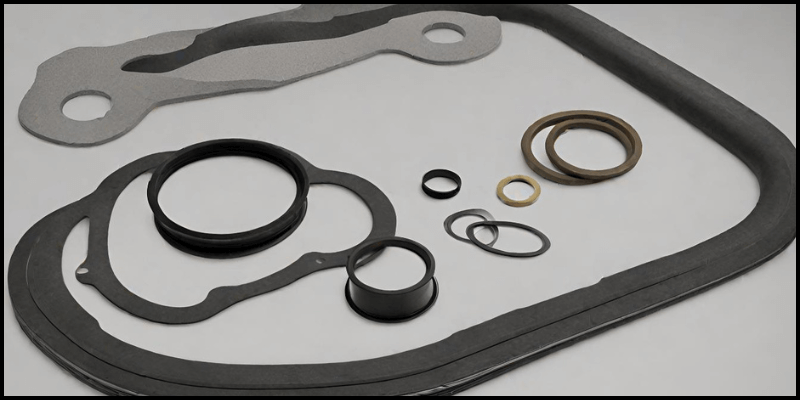
10. Replacing Worn Gaskets and Seals: phase-by-phase Guide
Replacing worn seals is a crucial task when it comes to maintaining the integrity and performance of your water outlet kitchen bibcock. Over time, these components can degrade, leading to exude and reduced.
Faucet Efficiency. To swap them, follow these Steps
Turn Off the Water Supply: Before you start, ensure the water supply to the bibcock is turned off to prevent any accidents.
Step1. Disassemble the faucet
Depending on your Moen standard, you may need to follow specific disassembly instructions. Usually, this involves removing the hold and the cap to expose the internal components.
Step2. Identify worn seals and o-rings
Carefully inspect the rubber seal and seals for any signs of wear or damage. Common indicators include brittleness, cracks, or deformities.
Step3. Disassemble the old rings and seals
Once identified, gently uninstall the old toroidal seal and seals. Using a small flathead flathead rotate driver or a pick tool may be helpful, but be careful not to damage any surrounding parts.
Clean the Area: With the worn components removed, clean any debris or buildup around the area where the new sealing ring and seals will be placed.
Step3. Install New Gasket and Seals
Place the new O-rings and seals in their designated places. Ensure they are correctly seated and evenly seated to prevent future discharge.
Step4. Reassemble the Faucet
After replacing the seals and seals, reassemble the gush in the reverse order you disassembled.
Test the faucet: Finally, check for ooze and ensure the grip moves smoothly.
By systematically replacing worn rubber seals and seals, you address the immediate issue of drip and contribute to the overall longevity of your spigot kitchen bibcock.
Step5. Solving Seep After Reassembly
Despite meticulous reassembly after maintenance or repair, seepage may still occur in your water outlet kitchen eject. Here are specific troubleshooting tips to address this issue.
Check Tightness of Components: Ensure all parts, especially the toroidal seal and seals you’ve just exchanged, are correctly seated and tightly secured. A detachable component can easily lead to leakage.
Inspect for Cracked Parts Even with careful handling, parts can develop cracks or damage that went unnoticed during assembly. Examine all components again, focusing on areas around where exudes are observed.
Reevaluate the washer and stopcock seat. A worn-out washer or an improperly seated valve seat is a common culprit for post-reassembly discharge.
Confirm that the washer is new and that it is the correct size and type for your AP prototype. Additionally, ensure the valve seat is clean and free from debris that could prevent a watertight seal.
Step6. Look for Additional Worn Parts
Sometimes, the issue might not be with the parts you’ve substituted but with others not identified as worn during the initial inspection. Double-check all parts of the bibcock, including those not directly involved in the water flow, as they can also contribute to leaks.
Step7. Test Water Pressure
Unusually high water pressure can lead to ooze in areas that would otherwise be well-sealed. If leaks persist, testing and, if necessary, adjusting the water pressure in your home can help resolve the issue.
By applying these specific troubleshooting tips, you can effectively pinpoint and address drips in your tap kitchen release after reassembly, ensuring a return to optimal performance and leakage prevention.
Step8. Ap Hold Feels Loose: Tightening and Adjustment Methods
A loose bibcock handgrip can significantly affect the usability and efficiency of your water outlet kitchen. Often, a loose lever results from normal wear and tear but can be easily tightened to restore proper
Step9. Function. Here’s how you can address an ax faucet handle
Identify the set clamp: The set screw secures the switch to the faucet’s stem. It’s typically located under a decorative cap at the base or side of the grip. Gently pry off the cap to access the slacken.
Step10. Tighten the Set Screw
Use an Allen socket wrench or a screwdriver (depending on the screw head) to tighten the set screw. Turn clockwise until snug, being careful not to over-cinch and strip the wist.
Step11. Check the Handle Base
If the hold feels slack after tightening the set rotation, the issue may lie with the handle’s base. Ensure that any retaining nuts or clips holding the base are correctly tightened.
Step12. Reassess After Tightening
Once everything is tightened, place the decorative cap back on and test the handle’s operation. It should move smoothly without wobbling or feeling unfixed.
Flowing these steps will typically resolve issues related to a loose AP handgrip, enhancing the stability and functionality of your Moen kitchen bibcock. If the handle remains detachable or exhibits other problems after these adjustments, further investigation into wear or damage to internal components may be necessary.
Step13. Disassembling the Older Tap Prototype: Special Considerations
Disassembling older water outlet kitchen bibcock templates requires a keen understanding of their unique design and component structure. Unlike newer models, which often feature standardized parts and more straightforward disassembly procedures, vintage Moen faucets might have specific quirks. Here are some considerations to keep in mind.
Step14. Identify your model
First, accurately identify your AP template. Older tap models might not have the example number readily visible, so you may need to refer to vintage catalogs or contact Moen’s customer support for identification.
Step15. Special Tools May Be Necessary
Some older models require specialized tools for disassembly, which are not commonly found in a standard toolkit. Check the user manual or Moen’s website for the specific tools needed for your pattern.
Step16. Use Caution with Corroded Parts
Over time, components may become corroded, making them more difficult to remove without causing damage. Apply penetrating oil to help untighten these parts before attempting disassembly.
Step17. Exchange Parts
Finding replacement parts for older faucets can be challenging. It’s essential to contact the tap directly or visit specialized retailers who may stock vintage or compatible parts.
It is preserving its function and aesthetic appeal.
Step18. Upgrading Your Spigot Control Arm
Compatibility and Establishment
Upgrading the button on your Moen kitchen bibcock is not only a way to refresh the look of your kitchen but also an opportunity to enhance functionality. When considering an upgrade, compatibility is critical. Tap designs its discharge handles to be compatible with specific standards, ensuring a seamless fit and operation. Here’s what you need to know about compatibility and setup.
Step19. Check Compatibility
Before purchasing a new lever, verify its compatibility with your current AP standard. Moen’s website offers a comprehensive guide, or you can contact their customer support for assistance.
Step20. Choose Your Design
Moen offers a variety of grip designs, from traditional to modern, to match any kitchen aesthetic. Consider ergonomic designs for ease of use, especially for households with elderly members or individuals with limited hand strength.
Step21. Gather Required Tools
For the implementation, you’ll typically need an Allen-Allen key or a Phillips head turn driver. Check the fitting guide for any additional tools specific to your new hold.
Step22. Mounting Process
Follow the detailed instructions for your new lever. This usually involves removing the old handgrip by loosening the Set constrictor, replacing it with the new handle, and ensuring all connections are secure.
Step23. Functionality Check
After establishment, test the handle’s functionality thoroughly. Make sure there are no exudes and that the knob operates smoothly without excessive resistance.
You are enhancing the beauty and efficiency of your kitchen workspace.
Step24. Maintaining Your Moen Faucet: Regular Check-Ups and Care Tips
Maintaining your Moen kitchen bibcock is crucial to ensuring its longevity and optimal functionality. Regular check-ups and proper care can prevent common issues such as discharge, corrosion, and wear and tear. Here are several specific tips for maintaining your Moen faucet.
Step25. Routine Cleaning
Regularly clean your gush with mild soap and warm water to prevent mineral buildup.
Inspect Aerators and Seals: Periodically check the aerator (the screen at the faucet’s eject) for lime scale and debris accumulation. Also, inspect rubber seals and sealing rings for wear and supplant them if necessary.
Step26. Lubricate Moving Parts
Apply silicone-based grease to moving parts such as the spigot grip and cartridges. This lubrication helps preserve the smooth operation and extends the life of these components.
Step27. Check for Leaks
Regularly inspect your AP for any signs of drip. Small drips can lead to higher water bills and potential damage under your sink.
Winter Care
If your kitchen is in an area that experiences freezing temperatures, insulate pipes connected to the bibcock to prevent freezing and potential bursts.
By following these specific care tips, you will ensure the optimal performance of your Moen kitchen release and enhance its durability, saving time and resources on potential repairs or changes in the future.
Conclusion
In conclusion, taking care of my Moen kitchen bibcock has become a crucial part of maintaining its functionality and aesthetics.
Through regular check-ups and adherence to the recommended care tips, I’ve managed to prevent the common problems many homeowners face.
Whether it’s ensuring the smooth operation of the cock knob, keeping the finish pristine, or promptly addressing any signs of wear and tear, I’ve found that a bit of attention goes a long way in extending the life of this essential kitchen fixture.
With the knowledge I’ve gained, I’m confident I can keep my AP in top condition for years to come, eliminating unnecessary hassles and expenses.
FAQs
How do you extract a push-fit faucet handle?
To detach a push-fit tap lever.
How do you release a Moen kitchen cartridge?
To disassemble a Moen kitchen cartridge, use a cartridge removal tool to rotate the cartridge 90 degrees and then pull it straight out.
How do you extract a faucet tap handle?
To uninstall the faucet tap handle, slacken the unloosened Set under the handle or on its side and lift the handle off.
How do you take off a kitchen control arm cartridge?
Disassemble a kitchen water tap handle cartridge, turn off the water supply, open the faucet to relieve pressure, use pliers to unscrew the bonnet nut, and pull the cartridge straight up.