

How to Remove Kohler Kitchen Faucet
Removing a Kohler kitchen faucet, a common task in many kitchen renovation projects might seem daunting at first glance. Faucets are integral to any kitchen, serving both functional and aesthetic purposes. Over time, they can wear out or go out of style, necessitating a replacement. However, the challenge often lies in the removal process, which can be unfamiliar territory for many homeowners.
Fortunately, with the right tools and a bit of guidance, this task can be tackled by almost anyone without the need for professional help. This article aims to demystify the removal process; following these instructions ensures a smooth and damage-free removal of your old Kohler kitchen nozzle.
Please read through this comprehensive guide, which aims to solve immediate problems and equips you with knowledge that could be useful for future projects. With detailed instructions and tips, this article is designed to help those with minimal DIY experience successfully remove their Kohler kitchen spout. Join us as we explore the best practices for this task and discover how easily you can upgrade your kitchen by starting with this simple project.
How to Remove Kohler Kitchen Faucet
If you follow the exact one given below by an expert, you’ll get a ride on your How to Remove Kohler Kitchen Faucet issue.
1 Turn Off the Water Supply
Locate the valves under your sink and turn the knobs clockwise to shut off both the hot and cold water water hoses. This prevents any accidental water spillage during the removal process.
2 Drain Remaining Water
Open the valve to release any water left in the pipes. This step ensures a dry working area and reduces the chance of water spillage.
3 Disconnect Water Supply Lines
Use an adjustable wrench to loosen the connections of the water pipes to the spigot. Once loose, carefully remove them. Keep a towel handy in case of any dripping water.
4 Remove the mounting nuts
Identify the nuts that secure the faucet to the sink. These are typically under the sink, attaching the ap body to the countertop. Use a basin or socket wrench to turn the nuts counterclockwise until they are removed.
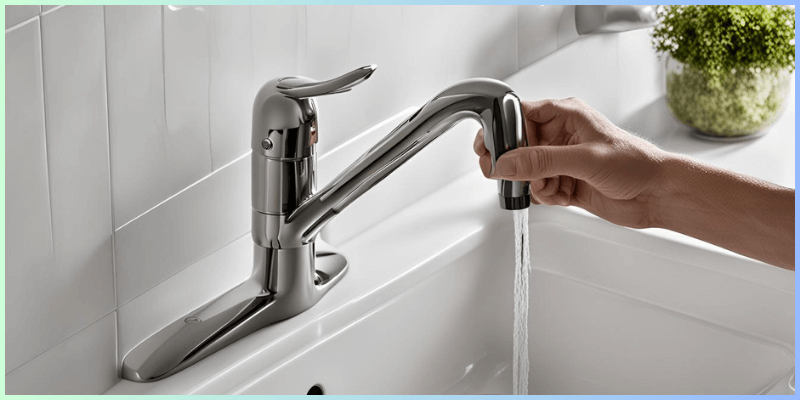
5 Detach the Faucet
Identify the nuts that secure the faucet to the sink. These are typically under the sink, attaching the ap body to the countertop. Use a basin or socket wrench to turn the nuts counterclockwise until they are removed.
With the mounting nuts removed, gently wiggle the faucet to loosen it from its position. Carefully lift the nozzle off the sink once it is free.
6 Clean the Sink Area
Remove debris, old plumber’s putty, or sealants from the basin surface where the old faucet was located. This prepares the area for the installation of a new spout.
7 Check for Wear and Tear
Examine the area for any signs of wear or damage, such as rust or leaks. Address these issues before attaching a new faucet.
8 Prepare for New Faucet Installation
If setting up a new valve, ensure the unit is compatible with your sink’s configuration. Gather all the necessary installation components.
9 Install the New Faucet
The new faucet is in place following the manufacturer’s instructions. Secure it by tightening the mounting nuts from underneath the lavatory.
10 Reconnect Water plumbing connections
Connect the water feed lines to the new spigot, ensuring a snug fit with the wrench but being cautious to keep the water inlet tubes from over-tightening. Turn the water supply back on, check for leaks, and adjust.
And prepare your washbowl for a new installation. Ensuring a functional and updated kitchen washstand area.
How to Remove Kohler Kitchen Faucet
How to Install a New Kohler Kitchen Faucet in Steps
This section will guide you through mounting a new Kohler kitchen ap. Whether upgrading your kitchen or replacing an old faucet, these simple steps will help ensure a smooth installation process.
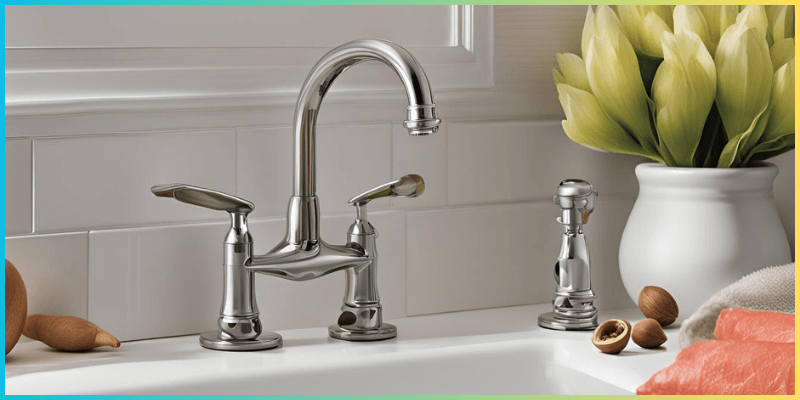
Step: 1 Inspect the New nozzle and basin Configuration
Before fixing it, carefully unbox your new Kohler water faucet.
Verifying that the spout model is compatible with your sink’s layout is equally important. Sinks come in various configurations, with different numbers of holes and spacing, so it’s crucial to select a faucet that matches your washbasin to avoid any installation issues.
Additionally, check the sink’s condition for any damages or irregularities that might affect the installation process. This initial inspection step is critical to a smooth and successful valve installation.
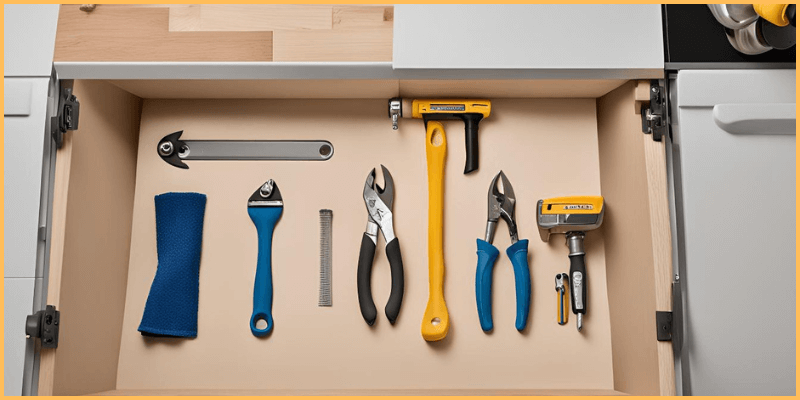
Step: 2 Gather Your Tools and Materials
Before starting the installation, organizing all the tools and materials you’ll need is imperative. This not only streamlines the process but also minimizes the chance of interruptions.
Essential tools for positioning a Kohler kitchen spigot typically include an adjustable wrench, a basin wrench, a plumber’s tape, a screwdriver, and silicone sealant.
A towel or a small bucket can also help catch residual water when disconnecting the old faucet.
Preparing these items in advance ensures a smoother installation process and helps avoid any unnecessary delays.
Step: 3 Install the Deck Plate (If Applicable)
Secure the ap to the lavatory
Once the deck plate (if applicable) is in place, carefully align the new Kohler kitchen nozzle with the mounting holes in your sink. Lower the faucet into position, ensuring the base sits flush and evenly on the washbowl or deck plate.
Throw any provided mounting hardware (nuts or washers) onto the faucet’s shanks from underneath the washstand.
Using a basin wrench, tighten these components to secure the faucet in place,
Ensuring the securely attached spout prevents leaks and provides stability and functionality over time.
Step: 4 Position the New Faucet
Connect the Water inlet tubes
With the new Kohler ap securely positioned,
Start by applying a small amount of plumber’s tape to the threads of the faucet’s tailpieces to ensure a tighter and more leak-proof connection.
Carefully align the water pipes with the tailpieces and hand-tighten the connections to avoid cross-threading. Once hand-tightened, use an adjustable wrench to snug up the connections, making sure not to overtighten, as this could damage the lines or fittings.
This step is crucial for a reliable water supply to your new faucet and minimizing the risk of leaks.
Secure the faucet beneath the basin.
After ensuring the faucet is positioned correctly, and the water water hoses are connected, the next important step is to secure the faucet from underneath the washbasin.
This involves tightening the mounting nuts or hardware. These nuts are secured against the bottom of the lavatory or countertop.
It’s essential not to overtighten, as excessive force can damage the washbowl or the faucet’s structure. Achieving a snug fit will ensure the faucet remains stable and leak-free.
Step: 5 Apply Plumber’s Putty or Silicone
Seal the base.
Before the installation is complete, an essential step is sealing the base of the faucet to prevent any water from seeping under the faucet into the cabinet below. Depending on your faucet model and washstand material, you may opt for either plumber’s putty or silicone sealant for this purpose.
Apply a consistent bead of your chosen sealant around the base of the faucet where it makes contact with the basin. If your faucet comes with a rubber or plastic gasket for this purpose, ensure it’s positioned adequately before applying the sealant.
After application, wipe away any excess to ensure a clean, professional finish.
Step: 6 Connect the water supply lines
Ensuring a secure and leak-proof connection is crucial once both water plumbing connections are connected to the faucet’s tailpieces.
Turn on the water supply valves slowly, allowing water to flow through the new installation. Keep an eye out for any signs of leakage at the connections. Turn off the water supply and slightly tighten the connections if you notice any drips or moisture.
It’s better to make these adjustments now than face water damage later. After confirming there are no leaks, proceed to test the functionality of your new Kohler washbasin tap.
Turn the faucet handles or lever to ensure smooth operation and confirm that hot and cold water flow correctly. This step not only verifies the success of your installation but also ensures that your new faucet is ready for daily use.
Step: 7 Remove Aerator if Present
Clear Any Debris and Reinstall
Before considering the faucet installation complete, remove the aerator, if your model includes one – as it is essential to clear out any debris that may have entered the system during installation. This simple step helps prevent clogs and ensures optimal water flow.
Run the faucet for a few minutes to flush out the lines thoroughly. After flushing, carefully reinstall the aerator, ensuring it’s securely in place but not overtightened, as this could make future removal difficult.
Reattaching the aerator marks the final step in your Kohler lavatory faucet installation, allowing you to enjoy the full benefits of your new fixture with peace of mind.
Step: 8 Turn On the Water Supply
Turning on the water supply is the moment of truth in your faucet installation process. Proceed to gradually open the shut-off valves underneath the washbowl, letting the water flow into your new Kohler tap for the first time.
Be attentive to any unusual noise or leaks around the connections and faucet base. If all seems well, allow the water to run for a few minutes to purge air from the pipes and ensure a steady flow.
This crucial step not only signifies the culmination of your installation efforts but also kickstarts the functionality of your faucet, marking it ready for everyday tasks. Remember, this is also the ideal time to make necessary adjustments to ensure everything operates smoothly.
Step: 9 Test the Faucet
Testing the newly installed Kohler water faucet is a vital final step in the installation process. Begin by thoroughly inspecting the faucet to ensure it is securely attached and that there are no visible signs of leaks at the base or connections.
Next, activate the faucet by turning on the handles or lever to assess the cold and hot water flow. Pay close attention to the water pressure, the ease of operation, and any unusual noises that could indicate air in the lines or potential issues.
This test should also include checking the spray function (if your model includes one) to ensure it operates smoothly and transitions back without issues.
If your faucet passes all these checks, congratulations—your installation is booming, and your faucet is now ready for everyday use.
Following these detailed steps, you can confidently install your new Kohler washstand tap, adding functionality and style to your kitchen.
Conclusion
attaching a new Kohler kitchen faucet on my own was a challenge I eagerly accepted, aiming to add functionality and style to my kitchen.
Each step, from securing the faucet underneath the sink to connecting the water supply lines, was approached with patience and attention to detail.
I learned the importance of not overtightening connections to avoid damage and the significance of sealing the base with a suitable material to prevent leaks.
Finally, turning on the water supply and testing the faucet was a moment of triumph. It was a rewarding experience that enhanced my DIY skills and left me with a beautifully functional kitchen centrepiece.
Withe can undertake this fulfilling task with the proper guidance and a bit of patience.